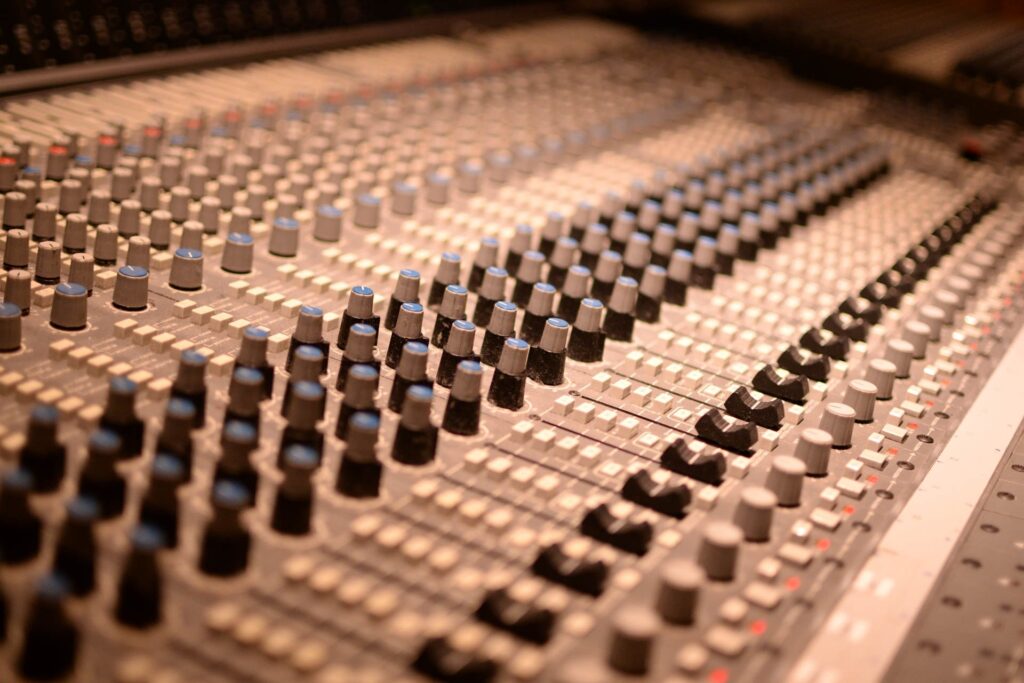
An audio mixer can seem very intimidating when all you see are buttons and knobs everywhere. This article will break down the fundamentals of a mixer so you can get started with live sound, recording in the studio, or getting some understanding of the mixer in your DAW.
So What is a mixer?
A mixer combines multiple audio signals and allows you to adjust the presence and volume of the overall song, track, or in other words “mix.” Check out the article, What is an audio mixer for more information about the types of mixers and their common uses.
Because there is so much to talk about what is in a mixer and how to use one. We are going to break this into two parts. Here is an overview of what we will be discussing…
Part 1
- analog v digital
- channel section
Part 2
- connection types
- aux buses
- onboard effects
- Recording options
Analog V Digital
Both analog and digital mixers will provide the basic gain, EQ, and pan control. They both process audio signals to be sent out to speakers, personal monitoring systems, and so on. During that process, each mixer sends out the signals in a different way.An Analog board mainly relies on electrical circuits and filters to send out signals to monitoring systems. A Digital mixer is a bit more complex. It converts the analog signal into digital audio data that is sent to an onboard processor where the signal will convert back to analog, sending it out to the PA system or personal speakers.
An Analog mixer will be more affordable and simpler to use, probably a good start for beginner live engineers to pick up. A Digital mixer will be much more costly mainly because you will have instant access to more onboard gear such as EQs, compressors, effects, etc.… whereas with an analog board what you see, is what you get kind of deal.
If you are looking for an entry way to mixers try out these mixers below. Heads up: This list includes affiliate links. If you click and purchase, I may receive a small commission at no extra cost to you. I only recommend gear I have personally vetted.
Channel Section
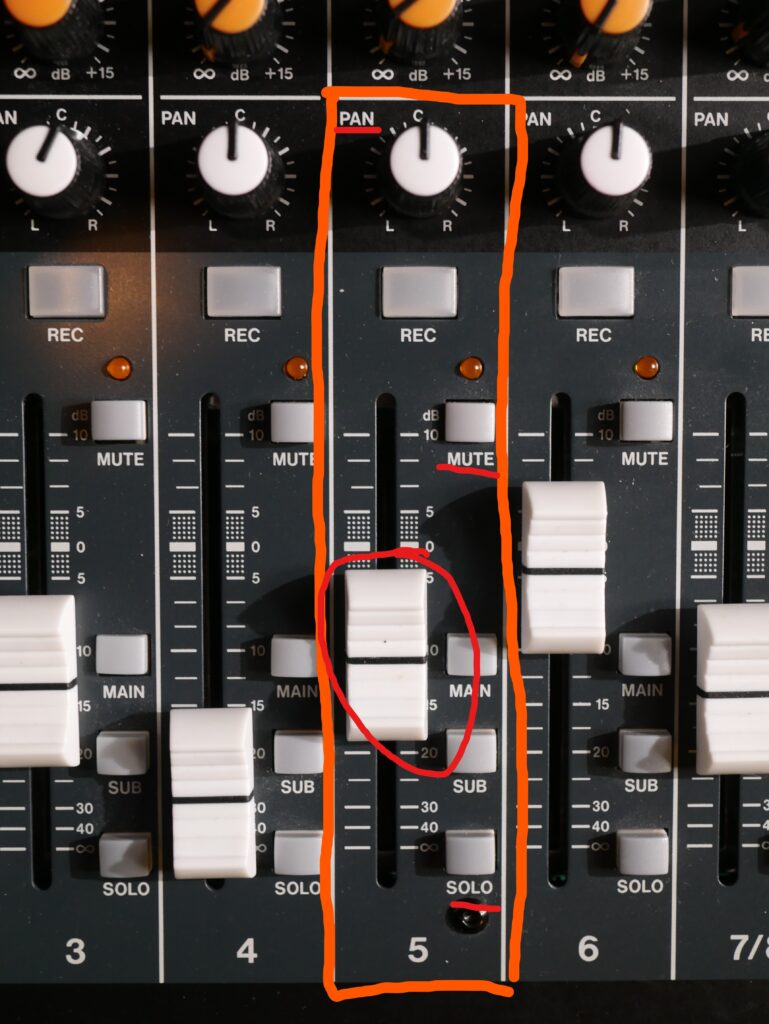
The Channel Section allows the audio engineer to balance each source in a mix as well as balance frequencies and dynamics. When taking a first look at a soundboard, the channel frame size is usually what intimidates the viewer. The best way to start learning the board is by learning a single-channel strip. Once you learn one strip you practically learned about 75% of the mixer.
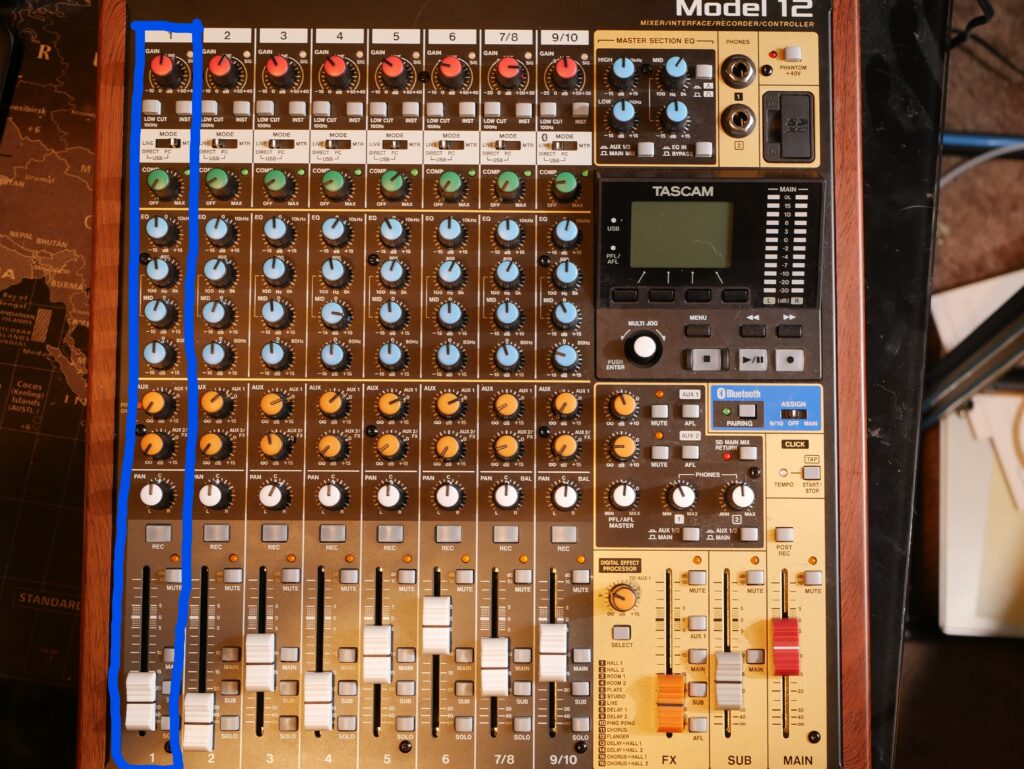
Inputs/Pre-Amps
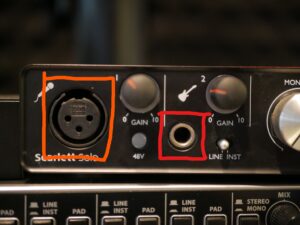 Each channel will be dedicated to the matching input the mixer provides, such as input 1 will be connected with channel strip 1, input 2 with channel strip 2, and so on. Most mixers will offer two connection types (see left image) : Mic (left) or Line (right) inputs.
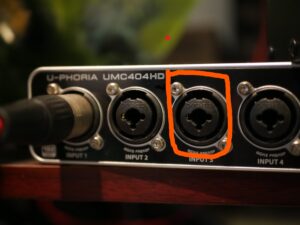
Sometimes manufacturers will combine these two connection types into one XLR connection called an “omni socket” or “combo input” ( see right image) . Think of a combo input as if the Mic input and line input had a baby, thus creating an omni socket. Regardless of the name, an omni socket will allow you to switch between an XLR cable and instrument cable giving you an instant and easy workflow for you studio.
When connecting a microphone to the soundboard the mixer gives the mike an added level of volume to the microphone also known as a pre-amp. A pre-amp boosts the volume level of the input source allowing the recordist or engineer to capture a higher quality sound whether its live or in the studio. Some mixers will have a special pre-amp on them that can sweeten the sound, but with this, these special boards can become costly.
When purchasing your first mixer, don’t hesitate so much on which type of input or preamp to rely on. Instead, focus on how many inputs you need for your studio. That will depend on how many instruments and microphones you will be using in your sessions. Mixers usually have an even number of inputs built in by the manufacturer, so if you only need 3 inputs it won’t hurt to have an extra on hand.
Gain/ low cut
The gain control is the first and probably the most important step into gain staging. Turning this knob to trim or gain depends on the volume of the source, the preamp, and how sensitive the microphone is.
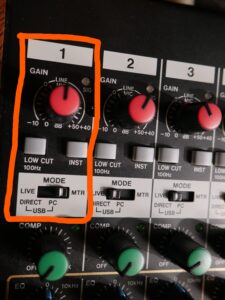
This is what separates someone who has no prior audio knowledge, and someone who is aspiring to become or is an audio engineer. There is no right or wrong setting to cut, it all depends on having the right amount of gain for the audio source.
In other words, audio engineers use listening skills and techniques to find the right amount of gain for the instrument or vocalist to be balanced in the overall mix.
The low-cut control is exactly what it’s called. It cuts the low end of an audio source. Some mixers will give the option to control how much the low end is being cut off and other soundboards will tell know how much is being cut off. This is used for an instant trim on unnecessary low-end frequencies the microphone is picking up.
In the technical world, it’s also called a “ High Pass Filter” because you are allowing the high frequencies to pass…. but a low cut makes much more sense and it’s easier to remember.
Dynamics ( noise gate/compressor/limiter)
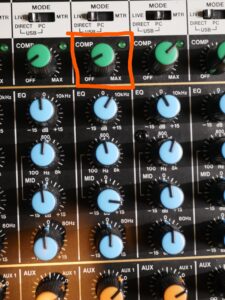
The noise gate is like a low cut, it will cut off unwanted frequencies at a touch of a button. The main difference is, the noise gate will activate a cut when the unwanted sound frequency bleeds through the main audio source. For example, the drum kick creeps through a singer’s microphone, thus creating unwanted low-end through that same microphone at various times. The noise gate will focus on cutting out that drum kick when it hears it. If it doesn’t hear a drum kick, the noise gate will release the trim thus allowing the low end to come through the mic.
Compressors help with evening-out elements from the audio source, making loud sounds quieter and quieter sounds louder, creating a balance in the overall volume level. But like everything else in this world, it comes with a cost. The gain in the same audio source is lowered so good thing compressors allow you to acquire the same, if not more, gain back. Compressors are also known to bring presence and punch into your mix.
The microphone picks up all dynamics of its acoustic source (vocalist, guitar, drummer), and with the gain and compressor giving it a boost, sudden loud spikes in volume can occur. The audio engineer uses a limiter so the overall level will not exceed the threshold or “roof” that was set.
Now, most modern audio mixers will provide these advanced features, but in case it doesn’t, your DAW will most likely provide you with a few in their mixer window.
EQ
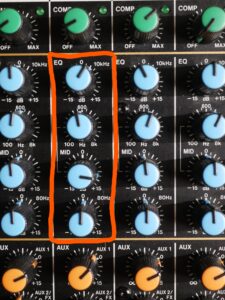
The famous EQualization control is the surgical station and best friend to the audio engineer. This is where you cut, add, and shape the overall tone of an audio source. You’ve probably used an EQ when listening to music in your car! Adding more bass to that beat baaaayyybeeeeuuhhh!!!!
There are different types of EQs the most common one is the parametric EQ. This gives the audio engineer more control of the bandwidth which determines the frequency range that is affected. In other words, the level of each frequency band can be adjusted up and down from side to side, letting the engineer optimize the tone of the instrument or voice.
Pan. Fader. Mute/Solo
The Pan is a simple control that will allow the positioning of a channel in the overall mix. This is a great tool to use when needing to give more space for another instrument to be present in the mix. The stereo image will also advance the sound creating a sweeter listen for the audience.
The Fader is a popular feature in a sound console. Once you have set all gain, dynamics, and EQ the fader should be the only control you need to mix the performance or concert. This section helps you see the overall volume levels of each channel allowing you to balance and create a great show.
The mute button is a way to cancel all volumes and controls coming from the same channel to silence it in the mix.
The solo button does the opposite and silences everything, but the audio channel it is soloing.
Conclusion
There you have it! 75% of the board has been covered in Part 1 of Basic Mixer Fundamentals . In Part 2 we will cover fundamentals and recording options where you can connect your mixer to computer for recording and playback programming.
If you have any questions comment below~!
